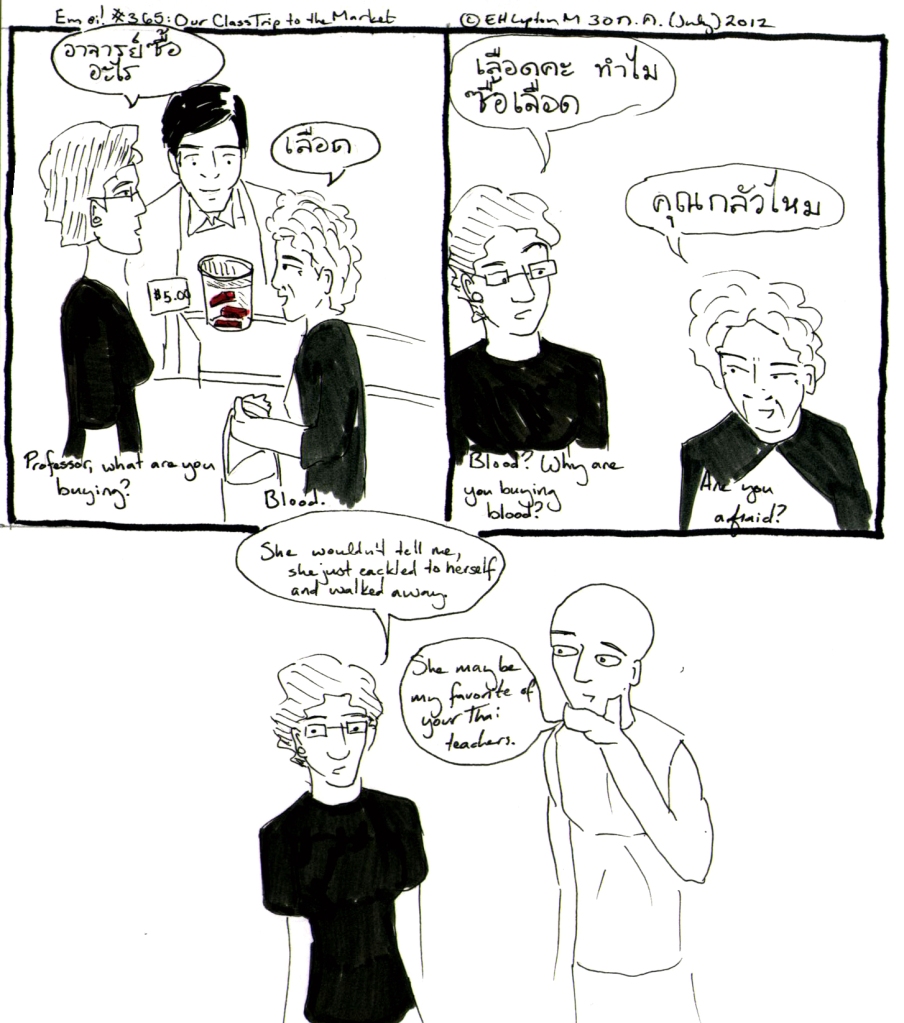
Em oi! #365: Our Class Trip to the Market

This all happened at a place called “Việt Hoa Market.” To judge from the characters on the sign (as is not uncommon for Asian shops in the US generally, the sign is written in both Chinese and Vietnamese/English), the name means “Beautiful Vietnamese Market.” The Việt used is 越, meaning of course the country of Việt Nam. The hoa used is 華, meaning đẹp tốt (beautiful). Of course, why the market is called this in the first place is a bit confusing, since my Ajaan (professor) thought that the owners are Chinese…

Interestingly, the dipthong “-oa” is not one used in Thai (the Thai dipthongs are, I think, -ua, –ua, and -ia). This means that when my Thai professors pronounce the store name, they say “Viet Hua.” I guess -ie is close enough to -ia that it makes sense to their ears, but -oa is not? Of course the ODDEST part of the whole experience (beyond watching, you know, the purchase of blood) was finding myself pronouncing the store name “Viet Hua” DESPITE THE FACT that I speak Vietnamese and KNOW how it should be pronounced!

By the way, if you are wondering how I came up with the Chinese characters/Vietnamese pronunciation (i.e., chữ nôm), you must check out Cao Dai Tu Dien. It has never been entirely clear to me why the Cao Dai are maintaining a dictionary like this, but when you know a little Vietnamese and a little Chinese and want to put the two together, it is invaluable.

I’ll file this comic under: GN450.2 L86 2012, for Anthropology—Ethnology. Social and cultural anthropology—Cultural traits, customs, and institutions—Economic organization. Economic anthropology—Distribution of goods and services—Commerce and trade—Markets.

If you were curious, the blood looked almost exactly like I have drawn it: rectangles of a dark brown-red color suspended in a water-like liquid (possibly water). I have no idea what it was treated with to make it do that.

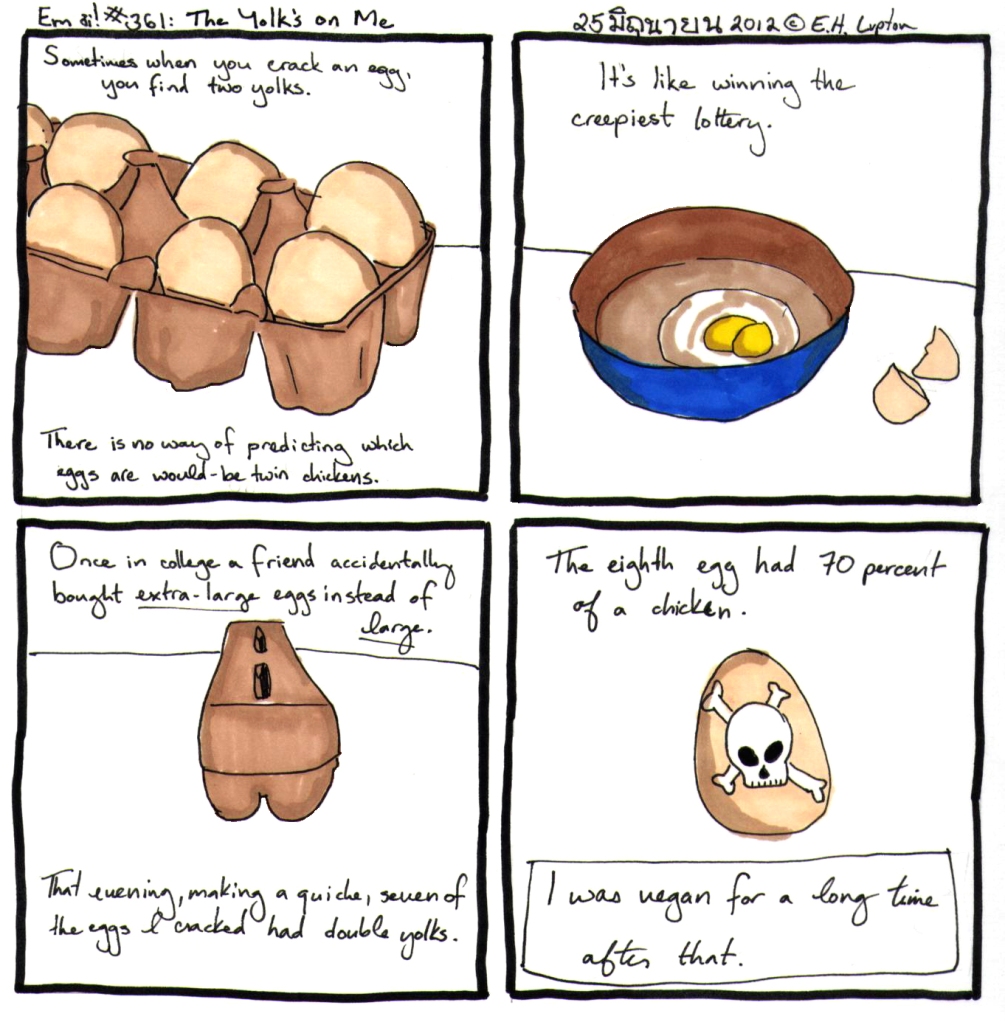
Em oi! #361: The Yolk’s on Me

It's  SO EGGCITING!

When I showed B this comic, he said, “I think you have to do some kind of penance for the title.”

Luckily my friend Rowan was the one who suggested it. 🙂

So the thing about eggs is that there are two kinds of eggs you can buy: Cage-free cruelty-free various-other-things-free free range happy chicken eggs, or cruelty-containing eggs. In the first case, you run the risk of having fertilized eggs (at least if you’re getting them from legitimately free-range chickens), because if the chickens are running around…well, sometimes they meet a rooster. This typically shows up as tiny blood spots on the yolk, and is only really a problem if you are trying to keep a Kosher kitchen, which my friends and I were doing during my undergraduate years. On the other hand, cruelty-containing eggs come from chickens that are confined to tiny cages and given no opportunities to meet with any other chickens of another gender, so all the eggs are unfertilized. BUT the addition of cruelty to the eggs makes them problematic for most vegetarian, especially those who are sympathetic to animal rights.

It’s a conundrum, I tell you. Anyway, this comic is why I don’t buy extra-large eggs (and why there was a long period of time wherein I didn’t eat eggs ever).

I’m filing this comic under TX745 .L86 2012 for Home economics—Cooking—Food of animal origin—Eggs. Incidentally this is the second comic this month that I have filed under TX7nn, the other being TX767.C5 L86 2012.

Also, happy anniversary to my cousin Jesse and her husband Keith, who got married one year ago today. Many happy returns, guys! 🙂

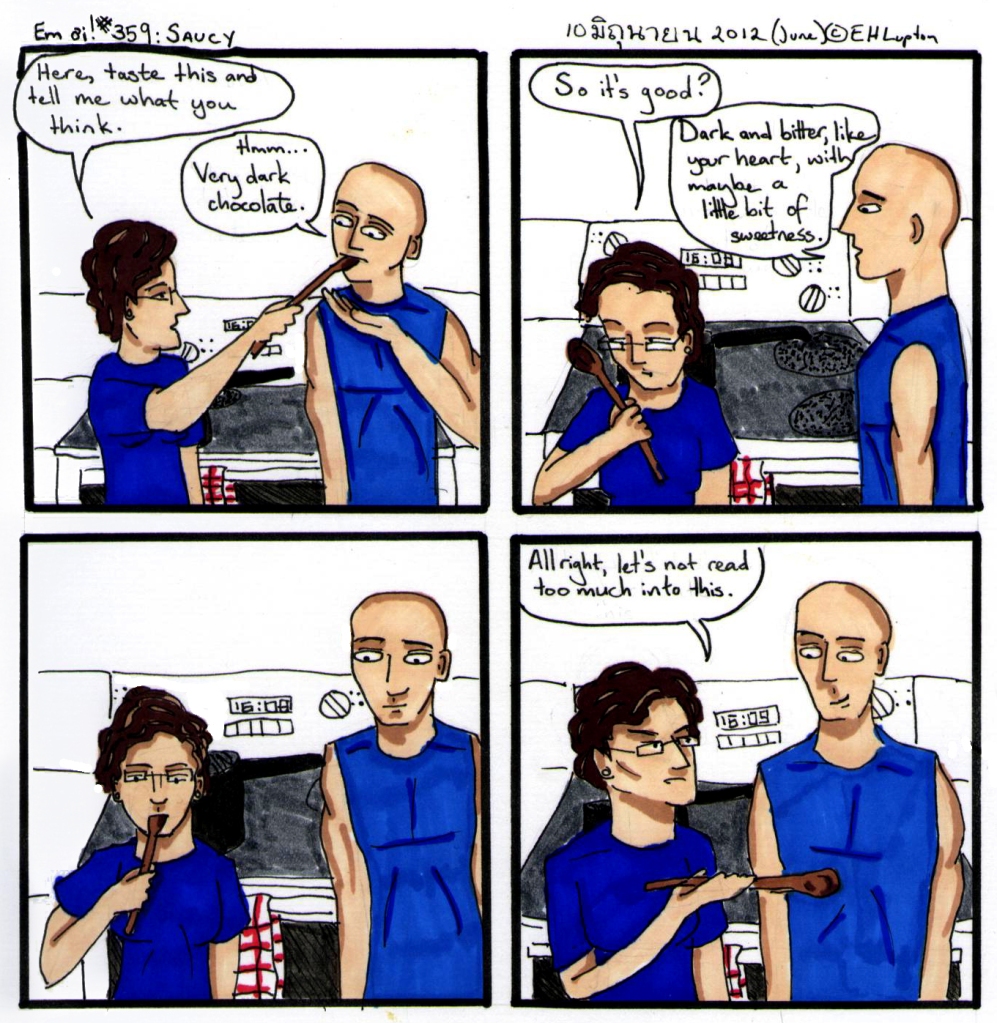
Em oi! #359: Saucy

"Quick! Taste this chocolate sauce!" This is uttered more frequently in my house than you might think.

We’ll class this under TX767.C5 L86 2012, for Home economics–Cooking–Baking. Confectionery–Recipes for special food products, A-Z–Chocolate. The recipe in question I was making is here, on David Lebovitz’s blog. It’s fantastic.

And in case you were wondering, it turns out a bottle of corn syrup will last pretty much indefinitely.

A few things: the About page has been updated, as has the Index of Comics. I have also added a Frequently Unasked Questions page. If you have anything you’d like answered on it, please email me (ehluptonATgmailDOTcom).

***

Yesterday I did the 26th annual Verona Hometown Days 10k. Because I’ve been doing a lot of speed work lately, and have seen (or imagine that I have seen) my times get slightly better, I thought I would do a little 10k to see how I am doing. There is nothing like a good race to really show you where you’re at. But the problem is, I am training for a long bike ride, so I cannot exactly put that aside and taper for a week. So instead, my training schedule last week looked like this:

Sunday: 32.2 mi bike ride, 6.3 mi run.
Monday: 8 mi run
Tuesday: 6.1 mi run (AM), 4×1000@4 min (ha) plus warm up and cool down for a total of 4.5 mi (PM)
Wednesday: 10.2 mi run, yoga
Thursday: 34.9 mi bike (includes commute), weights
Friday: 31 mi bike, yoga, weights
Saturday: 46.5 mi bike

So is this the best way to taper? Right. So. Also I went to bed quite late on Saturday and got up early on Sunday, even though Verona is only about eight minutes from my house.

When I got up, surprise, my quads (which had been very tired the previous day) felt fine, and my calf muscles felt all right. B took the dog out and I went off to Verona, arriving around 7:30.

It was already on the warm side (about 70 degrees), although my “heat training” (I do Bikram-style yoga–really, I do hot vinyasa yoga; I will explain the difference sometime) meant that I wasn’t feeling it as much as I might otherwise have been. Instead of bibs, we were given little strips with our names and a colored sticker indicating age group. This proved to be helpful (somewhat) during the race–I quickly ascertained that my age group was marked with a pink circle.

Since I live and run in the area, I knew the first mile and a half would be pretty flat, then hills through to mile five, then mostly downhill to the finish. Accordingly, I planned to: Go out as hard as I could, try to keep my pace steady on the hills but run conservative uphills if necessary, then really push it on the last 1.2 miles. (This is basically my strategy for every race, actually: Run fast, don’t stop.) A book on racing that I’ve been reading says the key to a good 10k is to run strong intermediate miles–it’s easy to find motivation at the start and finish and easy to get distracted in between. So that was another key to my strategy: Don’t falter between miles 2.5-5.

At 7:45, they shouted “go” and we took off, right up a hill. I passed a speedy-looking woman with purple KT tape on her back and, arriving at the top of the hill, realized I was the second place woman and probably fifth or sixth runner overall. The other woman was somewhat ahead of me and seemed to be moving comfortably. Our pace for the first mile was 7:15, which is not sustainable (I was shooting for 7:30s). So I decided, instead of grinding it out at the start, to wait and see if she would over-extend herself later in the race.

At mile 1.5 or so, another woman in a Berkeley Running Co. shirt passed me, and I had to let her go, settling into third place as we turned to go up the big hill next to Verona Area High School. I could see that there were some people back there, but it wasn’t until mile 3, when we headed out Northern Lights Road for an out-and-back section that I realized how far ahead I really was. The turn-around confirmed that I was pretty far ahead of the next woman, and so I ran a bit more conservatively on the way back through this section, which was very hilly. At mile 5, 9 Mound Road was a bit hillier than I remembered, and I had to push to keep my times up. It was getting very hot by this point, and there was not a breath of air to be had. I could see one (older) gentleman ahead of me, and if I turned I could pick out a man in a bright yellow jersey behind me, but basically I was alone. So basically I held onto 3rd place until the finish, where it turned out that neither of the women ahead of me were in my age group (I’d known about the first place woman, but the second place woman wasn’t wearing her strip where I could see it).

I won my age group with a time of 48:21.03. My splits were: 7:15, 7:45, 7:48, 7:59, 8:04, 8:01, 7:36 (pace over last .2 mi). This is an overall pace of 7:48, or about 14 seconds/mile faster than a tempo 10k run I did two weeks ago at track practice. So I’m pretty satisfied, although it is about what one would expect given my last 5k time and the bad weather.

In terms of lessons, I wish I’d tapered a bit better, slept more, and that the weather had been better, or that I’d had more time for yoga lately because that might have helped too. But overall, a solid performance. And really, I was not going to catch the first two women, and the next woman was not going to catch me, so I ran about as fast as I needed to.

Vegetarian

I’ve been a vegetarian for fifteen years now and this kind of thing still pisses me off.

Boy, I bet it feels nice to be in a super majority of people in the US.  Glad that doesn’t stop you from picking on the rest of us, because, you know, we might get “uppity.”

I ran 53 miles this week and biked 85, plus there was both weight lifting and yoga in there. My diet’s working just fine.

On Paula Deen

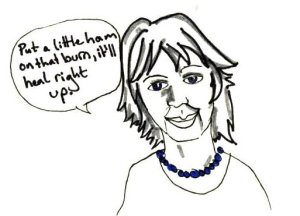
That's "HA-yam," y'all.

One of the things that interests me about Paula Deen’s recent revelation that she has diabetes (and is now a spokeswoman for Novo Nordisk) is how personally people seem to be taking it. A number of people on my friends’ list on Facebook (I know, the source of all truth) seemed very upset and seemed to view her diagnosis as comeuppance for the way she lives her life/cooks. Anthony Bourdain, who can always be counted on to say something mean if he is allowed to speak, calls her cooking habits “in bad taste” in light of her diagnosis. A number of people have implied that by cooking dishes with high quantities of butter, sugar, and salt, she was somehow intentionally raising the diabetes rates in this country so that she and Novo Nordisk could cash in.

Well, perhaps that’s a bit drastic as a characterization, but I have to say I’m surprised for two reasons:

  1. Her cooking is, I think, getting slammed unfairly.
  2. These rants very much absolve her viewers/followers of personal responsibility. If someone got diabetes from cooking a la Paula Deen every day, “It’s not your fault, Paula Deen said it was okay.”

I have to admit I’m a bit of a cooking show junkie, so when I say this about point #1: Paula’s meals are quite fattening, but overall I don’t think the so-called “Queen of Butter” uses more butter than Julia “Butter is Better” Child ever did. In fact, while it’s true that Paula never met something she couldn’t deep fry, Julia certainly matches her with butter, heavy cream, and wine. The major difference between the two of them is in the sophistication of their cooking—Paula Deen gets paid to cook “traditionalesque” southern food, while Julia Child was doing French.

Put this way, the opposition to Paula Deen’s method of cooking smacks of snobbery. It’s okay to use cream and butter if you’re making quiche—Julia’s recipe calls for over two cups of cream, as it happens (a mere 1,642 calories—as Julia once said, “If you’re afraid of butter, use cream.”)—but if you’re making Twinkie Pie, go to hell (for the record, Twinkie Pie uses neither cream nor butter). Of course Julia Child practiced portion control (she talks about it in her book My Life in France, anyway; I don’t think I’ve seen her mention it on her show). Oh, but Paula Deen says she doesn’t suggest anyone should eat the way she cooks every day (or she’s said that in interviews, again I don’t think I’ve seen her mention it on her show). But certainly I think it’s difficult to tar one of them on this count without hitting the other.

As for the second point, well… There is the matter of personal responsibility, certainly, and freedom of thought. I rarely make a recipe without halving the sugar, replacing some butter or oil with margarine or yoghurt, and generally trying to lighten things up. (I make béchamal sauce with skim milk. Julia would be ashamed to be in the same room with me.) But my point is that no one is forcing anyone to make Deen’s recipes or to make them as written. If we are going to claim that cooking as she does is somehow irresponsible, then can we follow it by saying it is irresponsible for a restaurant to serve fried cheese curds (a Wisconsin favorite) to an obese person (there are plenty here)? Don’t people have a right to make their own choices on what they eat? In fact, isn’t this one of the earliest rights that people claim for themselves as children barely removed from infancy?

One thing that struck me as interesting about all these interviews Deen has done is that she mentioned that initially, she didn’t really understand what diabetes was or what it meant that she had it. Recall that we are talking about a woman who grew up in a small town in the South, a place that does not have an awesome educational system, and she did not go to college. I know about diabetes because my mother is an endocrinologist. It’s possible that Ms. Deen did not grow up with these privileges and actually didn’t know, or at least didn’t understand, that this could be the outcome of her lifestyle. From my understanding, it is not unusual for people to go through a period of adjustment and denial when diagnosed with diabetes. Plus, people should be allowed to keep their medical problems to themselves, even if they are public figures.

That said, signing on as spokesperson for Novo Nordisk is opportunistic. I have to admit I don’t like drug companies (because of patenting issues, primarily—I’m not a conspiracy theorist). But it may be the case that she genuinely thought she could help reach out to her audience—people who, like her, may not know much about diabetes—and educate them. And make a tidy sum in the process; she’s a shrewd businesswoman. But I don’t think anyone, least of all Deen herself, is suggesting that with diabetes you can do what you want, then take a pill that makes it all better. Novo Nordisk is suggesting that they approached Deen because they thought it could be cool “to change some of her famously tasty, and butter-rich, and really unhealthy recipes.”

I won’t imply that all cooking shows are created equal when it comes to matters of health, but look at some of the things on Food Network’s lineup:

  • Diners, Drive-ins, and Dives: The overweight Guy Fieri goes from place to place and is filmed stuffing his maw with giant piles of meat, cheese, and fried things.
  • Sugar High: Duff Goldman, much as I love him, is another chubby guy carting from place to place EATING, in this case, CAKE.
  • Hungry Girl: Lisa Lillien really rubs me the wrong way. Never has “healthy” eating seemed less appealing (probably because instead of cooking genuinely healthy food, she takes all kinds of shortcuts so people can still eat their greasy terrible meat by-products without the guilt).
  • 30 Minute Meals: Rachel Ray has a terrible smile, and smiling terribly is all she’s good at. But although her food doesn’t seem awful, she doesn’t exactly cook with the precision needed for really healthy cooking. Know what’s the difference between one tablespoon of “EVOO” and three? About 240 calories. That’s the difference between measuring things and approximating.
  • Pioneer Woman Cooks: Ok, I happen to like Ree Drummond, and I have cooked stuff off her website…usually cutting the sugar and butter by quite a lot. She lives on a cattle ranch and never met a stick of butter she didn’t love.
  • Robert Irvine: I only ever see him on Dinner: Impossible, and most of what he does is yell at people. I’m just pointing him out because he’s the only really ripped chef. In the world.
  • Sandra Lee: While Sandra’s Money-Saving Meals is usually fairly healthy, Semi-Homemade sacrifices that for convenience. And while she’s willing to cut calories in food, she spends them on alcohol. I’m convinced she’s not fat only because she doesn’t eat and lives on breath mints and water when she’s not being cryogenically frozen prior to her next taping.

And looking at non-Food Network cooking shows I’ve enjoyed:

  • Two Fat Ladies: Exactly what it sounds like. Two fat, elderly women drink and smoke their way across England on a motorcycle, cracking nasty jokes about vegetarians all the while. I love it.

So what’s my point? First of all, it’s not unusual for cooks to be both personally rotund and cook unhealthy food. Second of all, this industry is ALL ABOUT cashing in on people’s love for highly caloric, fried, cheesed, delicious food. Third, Paula isn’t alone in cashing in on the latest health scare: FN announced a new series called Fat Chef which premiers 26 January. I can only assume that this is a less abusive version of Biggest Loser.

Finally, to blame Paula Deen for advancing the cause of diabetes through her cooking is to miss the whole tragedy of the cooking show. While record numbers of people are overweight, and cookbooks sell well and cooking shows are super popular, most of these people don’t cook. As Michael Pollan puts it, the Average American spends 27 minutes per day on food preparation, and cooking from scratch is all but dead (officially, “cooking” means you have to assemble elements—heating up a pizza, for example, doesn’t count, though making a sandwich does). That makes me a statistical anomaly, since I cook from scratch (I make sauces! I bake things without mixes! I make non-instant rice and lentils!) at least 3-4 times per week. People are not getting fat off of Paula’s deep-fried ham (or haa-yam, y’all) because they are not cooking it. They’re watching her cook, then having dinner at McDonald’s.

So rage against Paula Deen all you want. Unfortunately, it’s not going to help anything.

Hongdau Baozi

baozi

“Did she really make fresh bao?”
–Firefly

That episode of Firefly (Our Mrs. Reynolds). I’m sure you remember it, and how impressed Wash was by the production of fresh bao (baozi, a steamed Chinese bun filled with…well, whatever you want, basically).  Perhaps in the depths of space, this is a truly difficult feat, but as I’ve recently discovered, here on earth it’s not the least bit tricky.

Ok, that first paragraph was lost on anyone who has never seen Firefly.  See, you try to work some local color into a recipe and where does it get you?

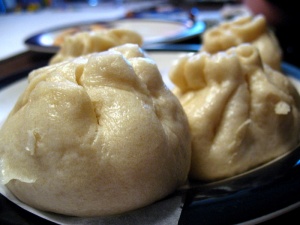
These are hong (red) dau (bean) baozi–meaning they’re filled with sweet red bean paste.  There are a lot of good recipes for this out there.  I got the idea from this helpful YouTube video.  She’s making anko, which is the Japanese equivalent.  This video from Cooking with Dog gives better instructions on how to actually make the paste.  The outside of the bao comes from a recipe I saw on Food Network, specifically a show called “What Would Brian Boytano Make?”, specifically this recipe here.

Red bean paste ingredients

  • 1 c. dried aduzki beans (you can probably get these at the grocery store.  I could, and my local grocery store doesn’t have a huge line in exotic foods — i.e., no semolina flour.)
  • 3/4 c. granulated sugar
  • pinch of salt
  • 2 T. butter (unsalted)

Red bean paste methodology

  1. Put adzuki beans in a bowl and cover with water.  Leave to sit overnight.  In the morning the beans will have swelled up and soaked up most of the water.
  2. Drain and rinse the beans, then put them in a pot with water to cover (about three cups).  Bring to a boil and then reduce heat to a simmer.  Let it cook for about an hour until beans are soft.  Skim off any scum or thick foam with a spoon or strainer.
  3. Drain and rinse the beans and put them in a bowl.  You can put the beans in the fridge overnight at this point.  That’s what I did (I was tired).
  4. When you’re ready, stick the beans in the Cuisinart and chop them up.  You’ll probably have to add a little water to get everything to chop up.  Make sure the paste is very smooth.  It will be kind of a light purple color and not very thick.
  5. Add sugar and salt and mix thoroughly.
  6. Put two tablespoons of butter (or neutral oil) in a pan.  When it’s melted, add the bean paste and stir fry it over medium-high heat until it thickens and darkens.  It will be a dark purple color when it’s done, and quite thick.  Put it back in the fridge and get the dough ready to go.

Bao dough ingredients

  • 1 1/4 tsp dry yeast
  • 1/2 c. water (warm but not hot)
  • 1 1/2 c. all purpose flour
  • 1 1/2 c. cake flour
  • 1/2 tsp. baking soda
  • 3 T. sugar
  • 1 tsp. salt
  • 1 T. melted margarine or neutral oil
  • 1/2 c. warm (not hot) milk (I used skim)

Bao dough methodology

  1. Add the yeast into the warm water along with a pinch of sugar and set aside.  When I say “warm” I mean “less than 110º or you will kill the yeast, but above 80º.  “Warm to the touch” is a good indicator.
  2. Mix dry ingredients (flour, salt, sugar, baking soda).  Add the milk, butter or oil, and water with yeast in it and mix well.  Turn dough out and knead about 5-10 minutes.  There isn’t much gluten in cake flour, so it won’t ever be quite as springy as regular bread dough, but it will get smooth and thick.
  3. Cover dough and let it rise for about an hour, until doubled in size.  Mine rose closer to 1.5 hrs, since I went running and showered before I rolled it out.  No harm done.
  4. Roll the dough into a snake.  Divide in half, in half again, and divide each quarter into thirds to make 12 pieces.  This will make REALLY BIG baozi.  If you want small baozi, halve or even third these.
  5. Roll the dough into a ball between your hands, then flatten and roll out until thin.  Try to make the edges thinner than the middle.  Add a good quarter cup of bean paste and gather the edges together.  Pinch the top firmly.  Let the baozi sit for ten minutes before you cook them.

To cook baozi

  1. Start a pot of water going.  Alternatively, put water in your rice cooker and turn it on.  This is what I did, since our rice cooker has a steamer attachment.  If you don’t have a steamer, you’ll have to improvise — try putting one of those racks for cooling cookies across a pot.  You’ll want it wide enough that you can get a lid on it, but there has to be water boiling and not touching the baozi.  You’ll figure something out.
  2. Each baozi can get its own little square of parchment paper.  OR you can cut out a big sheet of parchment paper in the shape of your steamer and punch little holes in it to let the steam through.  Whatever works for you.
  3. Put the baozi in the steamer and steam for about 12 minutes, until the baozi are shiny and cooked.  They will expand a lot in the steamer, so don’t put in too many at once.
  4. Serve warm!  Be careful, the filling will be hot.

So that was super easy.  You can put basically whatever you want in them.  I will probably try spinach and tofu next.

This recipe made about 13 baozi, enough to feed the four baozi eaters with baozi left over.  I could have easily made the baozi smaller and made at least 16 or so.

Notes:

If you decide to make this with a more savory filling (I used tofu, cabbage, mushrooms, and green onion), be warned: the wetness of the filling will make the dough very fragile.  Don’t roll them too thin, work quick, and consider steaming them seam-side (i.e., thick side) down.

Compound Butter: Maple

Considering that almost everything I cook is pretty low in fat, making compound butter was a weird experience for me.  But just like I wouldn’t dare to use fake maple syrup, I couldn’t very well make this with fake butter.

Let me warn you in advance that it is delicious.  I licked it off my fingers and had to forcibly restrain myself from eating it out of the bowl with a spoon like cookie dough.  Is that gross?  I would think so, but it is so delicious, I’m not sure I care.

Ingredients

  • 3 sticks of butter (sweet butter, or else omit the salt)
  • 3/4 tsp. salt
  • 1/4 c. plus 1 T. maple syrup
  • 1 T. powdered sugar
  • A pinch of cinnamon

Other equipment: piping bag, if desired.  Jars for storage.

Method

  1. Let the butter come to room temperature.  Mine was out of the freezer and in the fridge for a couple of hours, then on the counter for about two or two and a half hours.  You have to plan a little bit ahead, is what I’m saying.
  2. Cut the butter into small pieces and put it into the food processor.  If you have a stand mixer, that will also work.  Or one of those electric egg beaters is also good.  By small pieces I mean about tablespoon-sized.  You don’t have to be too precise.
  3. Beat the pieces of butter until relatively smooth.  It will still be kind of lumpy and weird at this point.  Add the maple syrup and beat until smooth.  You will have to stop from time to time to scrape down the sides.
  4. Add the salt, cinnamon, and powdered sugar.  Mix and taste.  Adjust flavors as desired.
  5. Using a spatula, transfer to an empty, clean jar (like a peanut butter jar).  Alternatively, load up your piping gun/bag and pipe the butter into the jar.  Very pretty.
  6. Put jar in fridge until butter is firm.

How to Truffle

Peanut Butter Truffles

Bryan went out of town on a business trip.  I wanted to make him some peanut butter cups (because he loves peanut butter cups), but it turns out PB cups are kind of complicated.  Truffles, on the other hand, are easy.  And when B got sent home two days early, I decided the easy route was the way to go.

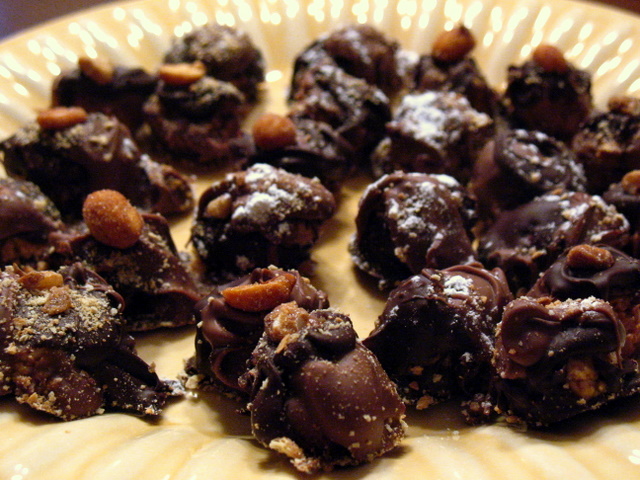
I’m not entirely satisfied with the truffle centers — they needed a little more PB to hold them together, or they needed to be frozen before coating or something (a couple of them started to fall apart while dipping).  And they’re definitely not pretty, but I’m not actually sure how to make pretty truffles.  I will leave that to professionals.  This recipe comes from Chow Hound, but with a few changes (I cut it in half and added some dark chocolate).  They note that the cups will keep up to three weeks in the fridge.  That is a lie–they kept a bit less than 24 hours (because B had eaten them all.  Well, I had a couple.  They were delicious).

Ingredients

(Makes 24 teaspoon-sized truffles.)

  • 1/6 c. graham cracker crumbs (I used cinnamon graham crackers crunched up in the food processor.)
  • 1/3 c. powdered sugar (sifted)
  • 1/3 c. + 2 T. (approximate) peanut butter (I used a smooth,  “natural” pb, not JIF or some crap something like that which is full of sugar.  If you’re using pre-sweetened PB, consider adjusting the amount of powdered sugar downward.  Chunky should be fine, and you can probably use almond, cashew, or sunflower seed butter.  Whatever floats your boat.)
  • 1 tsp vanilla
  • A pinch of salt – I forgot this.  But it would have been nice.
  • 1/2 c. plus a handful milk chocolate chips
  • 1/2 c. plus a handful semi-sweet chocolate chips

You’ll also need a saucepan, some heavy glass bowls, tin foil, and an ice cream scoop or large spoon.

Procedure

Part I — the middles

  1. Put the graham cracker crumbs, powdered sugar, and peanut butter in the food processor and mix it together until it has the texture of cookie dough or similar — it will clump together readily.  If it seems crumbly, add more peanut butter.
  2. Using a teaspoon, scoop mixture into teaspoon-sized balls and place on a cookie sheet or baking dish lined with foil.
  3. Put these into the fridge or freezer for at least an hour.

Part II — Tempering the chocolate

There are a lot of discussions on this–here is one of the better ones.  Basically you have to maintain the crystal structure of chocolate as you melt it, otherwise it will not solidify correctly.  People don’t want truffles to get all over their fingers.  If you’re thinking tl;dr or just don’t care about the science, I’ll tell you approximately what I did.  Otherwise feel free to use your favorite tempering method for melting the chocolates (melt them separately and keep them warm over a pot of water–don’t let the water touch the bottom of the bowl they’re in).

  1. Place chocolate in a heavy glass bowl (like Pyrex).  Put it over a pot of water and bring it (the water) to a boil.  Keep an eye on the chocolate during this period.  After a while, it should begin to look melty, but still be in the shape of the chocolate chips.
  2. Remove the bowl from the heat and mix the chocolate.  All the chips should mush together into a smooth mixture without lumps.  At this point, add a handful of chocolate chips (of the same type, milk or dark chocolate) to act as seed crystals.
  3. Because we melted the chocolate at a fairly low temperature, the seed crystal step may not be necessary, but it can’t hurt.  The residual heat should melt the newly added chips; otherwise, scoop out anything that doesn’t melt.  Put the bowl back over the boiling water briefly if the chocolate gets stiff.  You are now ready to dip.

Part III — Dipping the truffles

  1. Dip an ice cream scoop or large spoon into the chocolate.
  2. Shake it off so it is coated with chocolate.
  3. Put the truffle center in the ice cream scoop/spoon and rotate it until it is covered in chocolate.  Then put it on a foil-lined baking sheet.
  4. Do 12 in milk chocolate and 12 in dark chocolate, then use the remaining chocolate to touch up the bald spots (use the semi-sweet here on the milk chocolate truffles and vice-versa).
  5. If one of the centers starts to break up while you’re dipping it, don’t panic.  Just put it on the baking sheet and put a big dollop of chocolate on to hold it together.  It will harden into a truffle.
  6. You can top the truffles with: powdered sugar, sugared walnuts, honey-roasted peanuts, whatever strikes your fancy.  I went with a little of everything on the off-chance that if they were ugly to begin with, becoming really ugly would somehow make them cute again.
  7. This strategy was unsuccessful.
  8. When all the truffles are coated, put them into the fridge for another 30-60 minutes, until the chocolate is hard.  Because you tempered the chocolate, you shouldn’t have probTruffles!lems removing the truffles from the cookie sheet and putting them on a plate.

That’s it.  Not too hard; the active parts of the recipe only take about 30-40 minutes all together.  If you’re really patient you should make a big batch with different flavors and give them to people for Hannukah.  I’m not really patient, so I only make truffles for people I really like.

Comfort Food: Baked Squash with Lentils and Rice

I had this marathon dentist appointment yesterday.

Dentist: Well, not quite a marathon, more of a half marathon.   (True, he actually said this.)

Emily: My half marathon PR is about an hour shorter than this appointment.

I went in at 9:30 and left at 12:15, is what I’m saying.  And that was for four cavities, as mentioned previously.  Yikes. That much terror is exhausting, though luckily the appointment was relatively pain-free.

So with Bryan out of town and the election results not coming up in favor of the candidates I was backing (Go Tammy Baldwin, though!  I’m so glad she beat Chad Lee, who was an ass of the first degree), I needed something comforting to eat.  Comforting and soft.  And easy.

Then I remembered we had an acorn squash!  Since Bryan dislikes squash, I told him I would be cooking and eating a bunch of it while he was gone.  Alas, all the recipes I found on the internet were for squash coated in brown sugar.  Now brown sugar and squash are a good combination, but after all that dental work I was a bit reluctant to make something hugely sugary (this resolution lasted until 22:00).  So I had to make up a recipe.  This is it.  It takes about an hour to make, but that’s about fifteen minutes of actually doing things and the other forty-five minutes of sitting in the next room reading blogs doing homework.

squash

Ingredients

  • 1 acorn squash, cut in half (equatorial, not longitudinally–you want to wind up with rings of squash when you are done) seeds removed.
  • About 1 tsp of pesto and 2 tsp of margarine, mixed, with a pinch of rosemary and cayenne.
  • 1/3 c. of (brown or green) lentils and 1/3 c. rice.  The lentils I buy are brown in color but technically I think they are green lentils.  I don’t know.  Lentils.
  • 1/4 c. of red lentils.
  • 2/3 c. + 1/4 c. water.
  • Spices like 1 cube veggie bouillon, a bit of the margarine/pesto mix, whatever you like on your lentils.
  • A handful of sliced Crimini mushrooms.
  • A splash of Marsala.
  • Some pasta sauce (I like Newman’s Own).

What to do:

  1. Preheat oven to 375°.  Smear the insides of the halved squashes with the butter/pesto mixture and drizzle with balsamic vinegar if you want.  You may want to score the squashes — I didn’t but it would have been a good idea.  Also salt and pepper (I forgot).  Put the squash in a foil-lined baking dish and stick them in the oven.  Set timer for 30 minutes and get the rice cooker ready to go on the rice and lentils, but don’t turn it on yet.
  2. At the 30 minute mark, turn on the rice cooker and set the timer for 15 more minutes.
  3. At the 45 minute mark, check the squash.  If it’s done, take it out, otherwise give it another 10 or so.  Saute the mushrooms in a little butter.  I usually do this over high heat because I like my veggies to get brown and kind of seared.  Bryan thinks this is heretical and does them over medium when he’s cooking.  So pick the method you’re comfortable with.
  4. When the mushrooms are done, deglaze the pan with Marsala and add a half cup or a cup of tomato sauce, just long enough to warm up.
  5. Plating: Ring of squash on the bottom, stuffed with lentil/rice mixture in the middle, topped with mushrooms and sauce and Parmesan cheese after that (if you want cheese).

This recipe would be good without the tomato sauce too.  Go with what you’re feeling, that’s what I’m saying.

Lentil, Chickpea, and Potato Curry

I’ve now closed all the tabs for the recipes that inspired this –  I think this may have been one, maybe this as well, and I spent a goodly time browsing the archives of Indian food blogs like One Hot Stove.  What came out, while not exactly an authentic dish, is delicious and healthy.  I suppose it could be called a channa dal (I think “channa” refers to chickpeas, “dal” to lentils).  Potatoes are aloo. So this should be aloo channa dal?

I served this with chappati, the technique for which I’m still perfecting.

Continue reading “Lentil, Chickpea, and Potato Curry”